< JSP와 연동해서 로그인하기 >
- 아래 포스팅에 시작부터 간단히 테스트한 거 볼 수 있음
[Android] JSP서버와 안드로이드 연동
< 로그인해서 서버 연동 > ① 안드로이드 로그인 화면 - 오른쪽 화면 메뉴 중 로그인이라는 메뉴를 눌렀을 때 로그인할 수 있는 창 등장 - 확인 버튼을 눌렀을 때 로그인한 서버 연결 public boolean on
heezit.tistory.com
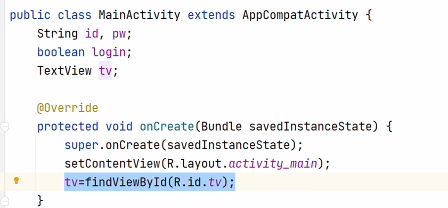
① MainActivity.java
- EditText에 사용자가 작성한 아이디와 패스워드를 가져와서 비교 후 로그인
- EditText를 변수로 받아옴
- DB 연결 필요
public class MainActivity extends AppCompactActivity{
String id,pw;
boolean login;
TextView tv;
String msg = null;

@Override
public boolean onOptionsItemSeleted(@NonNull MenuItem){
    super.onOptionItemSelected(item);
    switch(item.getItemId()){
        case 1:
            View dlgView = View.inflate(MainActivity.this, R.layout.dialog1,null);
            EditText et1 = dlgView.findViewById(R.id.et1);
            EditText et2 = dlgView.findViewById(R.id.et2);
            AlertDialog.Builder dlg = new AlertDialog.Builder(MainActivity.this);
            dlg.setTilte("로그인하기");
            dlg.setIcon(R.drawable.icon2);
            dlg.setView(dlgView);
            dlg.setNegativeButton("취소",null);
            dlg.setPositiveButton("확인",new DialogInterface.OnClickListener(){
            	@Override
            	public void onClick(DialogInterface dialogInterface, int i){
                    id = et1.getText().toString();
                    pw = et2.getText().toString();
                    Thread t1 = new Thread(new Runnable() {
                        public void run(){
                            login = connect();
                        }
                    });
                    t1.start();
                }
            });
            dlg.show();
            return true;
    }
    return false;
}

private void connect(){
    String urlPath = "http://나의 IP주소:8000/LoginTest/login.jsp?userid="+id+"&userpw="+pw;
	try{
        URL url = new URL(urlPath);
        HttpURLConnection con = (HttpURLConnection)url.openConnection();
        if(con != null){
            con.setRequestMethod("GET");
            con.setDoInput(true);
            con.setDoOutput(true);
            int code = con.getResponseCode();
            Log.i("mytag","RESPONSE_CODE : "+code);

            InputStream input = con.getInputStream();
            BufferedReader reader = new BufferedReader(new InputStreamReader(input));
            StringBuffer buf = new StringBuffer();
            String str = reader.readLine();
            while(str != null){
            	buf.append(str);
                str = reader.readLine();
            }
            reader.close();
        }
        con.disconnect();

    }catch(Exception e){
        Log.i("mytag",e.getLocalizedMessage());
    }
}

}
② DB 연결 (MySQL)
- 아래의 DB 데이터를 기준으로 로그인 체크할 거임

<%@page import="java.sql.ResultSet"%>
<%@page import="java.sql.PreparedStatement"%>
<%@page import="java.sql.DriverManager"%>
<%@page import="java.sql.Connection"%>
<%@ page language="java" contentType="text/html; charset=UTF-8"
    pageEncoding="UTF-8"%>

<% String userId = request.getParameter("userid");
   String userPw = request.getParameter("userpw");

	  // 설치한 드라이버를 로드
	  Class.forName("com.mysql.jdbc.Driver"); //Mysql-8.xxx

	  // 2. 드라이버를 사용해서 DB 연결
	  Connection con =
		  	DriverManager.getConnection("jdbc:mysql://localhost:3306/javadb", "root", "1234");

	  System.out.println("DB연결 성공!");
	  System.out.println(" con : "+con);

	  String sql ="select * from manager where manager_id='"+userId+"' and manager_pwd='"+userPw+"'";
	  PreparedStatement pstmt = con.prepareStatement(sql);

	  ResultSet rs = pstmt.executeQuery();

	  String msg = "false";
	  while(rs.next()){
            msg="true";
	  }
%>

<%=msg%>


③ connect 메서드 변경
- connect 메서드를 void형이 아닌 boolean형으로 변경
- result 값 부여해야함
private boolean connect(){
    StringBuffer buf = new StringBuffer();
    String urlPath = "http://나의 IP주소:8000/LoginTest/login.jsp?userid="+id+"&userpw="+pw;
	try{
        URL url = new URL(urlPath);
        HttpURLConnection con = (HttpURLConnection)url.openConnection();
        if(con != null){
            con.setRequestMethod("GET");
            con.setDoInput(true);
            con.setDoOutput(true);
            int code = con.getResponseCode();
            Log.i("mytag","RESPONSE_CODE : "+code);

            InputStream input = con.getInputStream();
            BufferedReader reader = new BufferedReader(new InputStreamReader(input));

            String str = reader.readLine();
            while(str != null){
            	buf.append(str);
                str = reader.readLine();
            }
            reader.close();
        }
        con.disconnect();
        return Boolean.parseBoolean(buf.toString());

    }catch(Exception e){
        Log.i("mytag",e.getLocalizedMessage());
    }
    return false;
}
④ run 메서드 변경
- 로그인 되면 로그인 결과를 화면으로 보여줌
- TextView에 아이디값 부여하고 들고오도록
- onCreate 메서드에 TextView 아이디값 들고올 수 있게 추가
public void run(){
    login = connect();
    if(login){
        msg = "로그인 되었습니다.";
    }else{
        msg="로그인 실패하였습니다.";
    }
    runOnUiThread(new Runnable(){
        @Override
        public void run(){
            tv.setText(msg);
        }
    });
}


'자바 웹 개발자가 될거야 > JAVA' 카테고리의 다른 글
| [Android] 파일 처리하기 / 파일 저장 및 읽어오기 (0) | 2022.01.24 |
|---|---|
| [Android] JSP서버와 안드로이드 연동 (0) | 2022.01.13 |
| [Android] 부산 주차장 데이터 가져와서 어플 만들기 (0) | 2022.01.13 |
| [Android] 안드로이드 4대 컴포넌트 (0) | 2022.01.03 |
| [Android] 선그리기, 원그리기 (0) | 2021.12.30 |


